|
10mm pressure testing
benchrst builds a Pressure Trace platform |
|
1: Any attempt to duplicate / simulate, actual or otherwise, is at own risk. 2: I firmly believe this device is in compliance with ATF "can own it, can build it" guidelines. 3: I have no illusion that results will be definitive. 4: It's ok to laugh, I have no metal working knowledge or tools :) This project now spans four pages. Part 1: This page, the initial build. Part 2: Updates and modifications. Part 3: Additional updates Part 4: Progress Results are here. Why? Have all the usual published sources, and initially stayed there. Started playing with QL, and discovered McNett's data. Very carefully ventured off book, worked up loads with powders there was no data for, measuring everything measurable along the way. 44 powders, 9 primers, 79 different bullets, and 811 loads later, everything is intact. The G20 looks and works as new, and the worst offence is a slightly smiled case. That said, from early on I've wanted to know what the pressures were. I've read enough, it's not as simple as a universal chamber from HS, and a piezo from PCB (capital setup). PT II, the only economical, "don't need an engineering degree" option available. Challenge is, a strain gauge requires a round chamber. Not too common in 10mm. The Contender is an option, but $. You can buy an AERO barrel... Chose a LW barrel (my FIL owns a mill and lathe, and graciously showed me how to turn the chamber to round). 18 months of conceptualizing, a year since I purchased the PT II, and this is what I came up with: A metal base, mounted to heavy drawer guides, bolted to a second wood base that would be "field mounted' to a table. 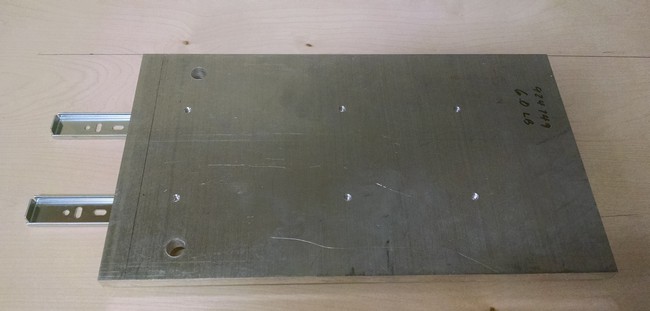
I certainly could have continued used my FIL's lathe and mill, but the 5 hour round trip simply wouldn't work. To secure the barrel I used an inexpensive barrel vice. Machine work would be rudimentary: An old Harbor Freight hobby drill press; Cordless drill; A few taps; A square. 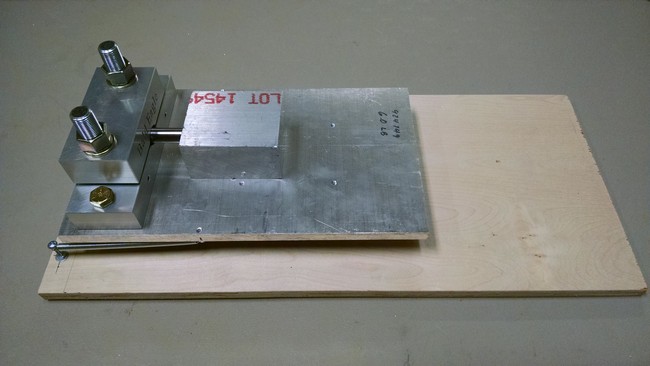
The aluminum stock was as purchased from a local hardware store's 'scrap' pile, absolutely overpaid for it. The metal plate glides on heavy duty drawer guides that are bolted to the wood platform. The springs handle recoil. No idea if it'd work, a complete guess. 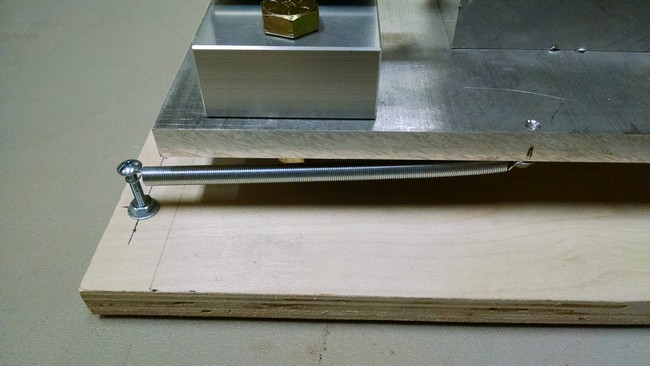
Mocked up. 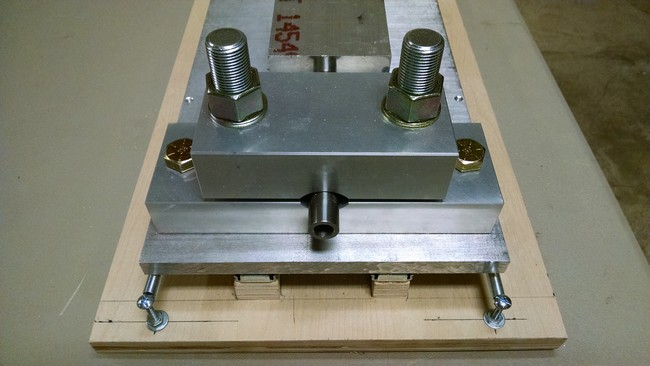
Drilling & tapping the thrust block / breech face. 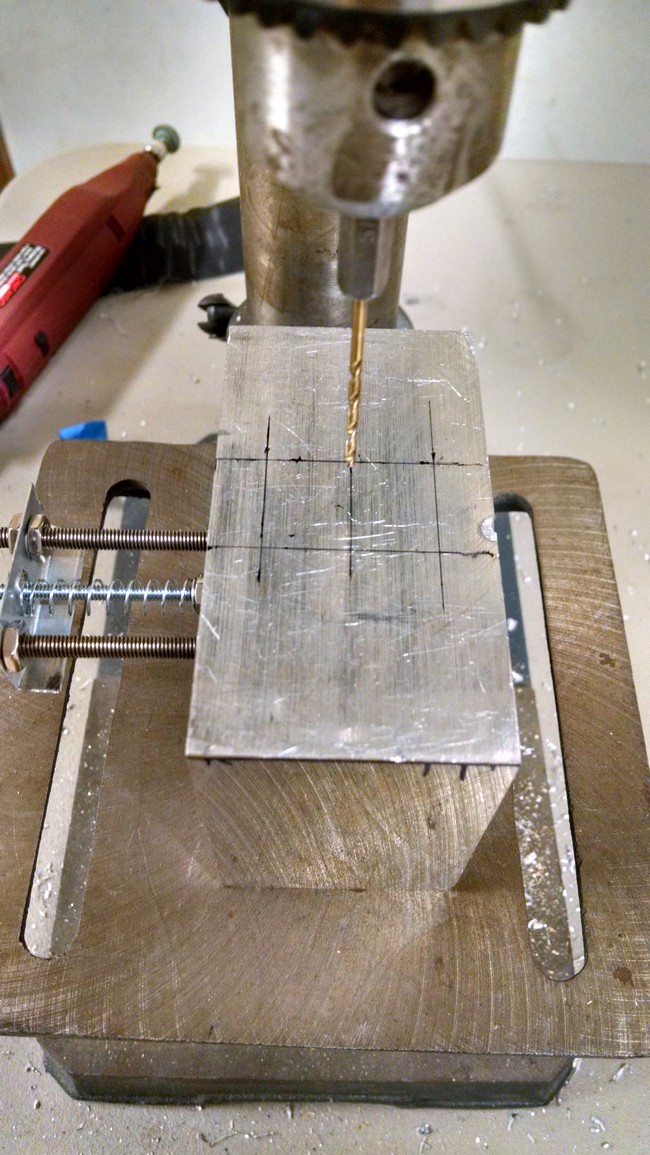
Doing my best to transfer thrust block holes to the metal base. 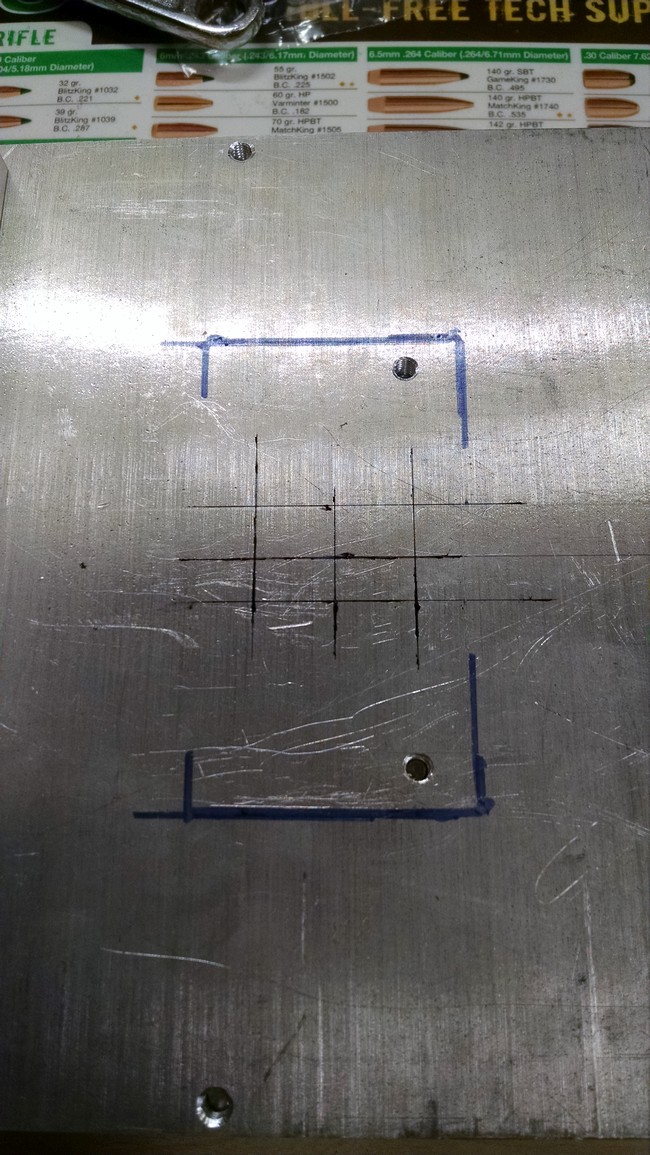
Thrust block / breech face drilled & tapped. Pictured is the 1st version of the firing pin assembly. The spring creates tension as the pin (threaded rod) is drawn back, the two nuts against the block control the pin's strike depth. 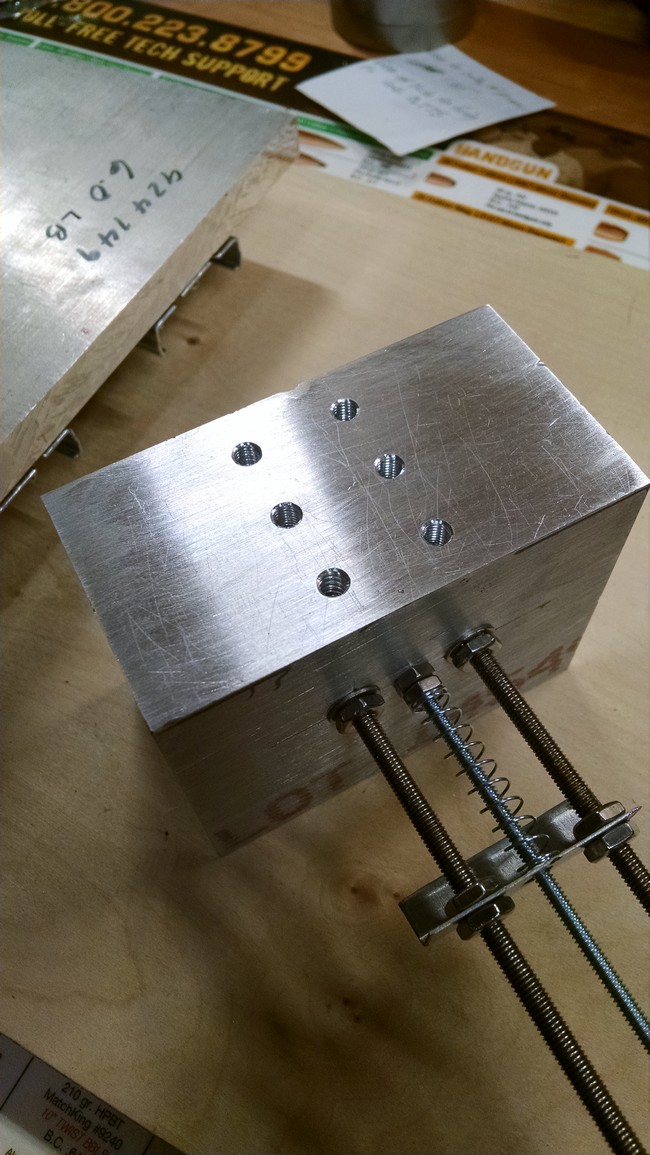
Barrel in vise, chambered dummy round against breech face. 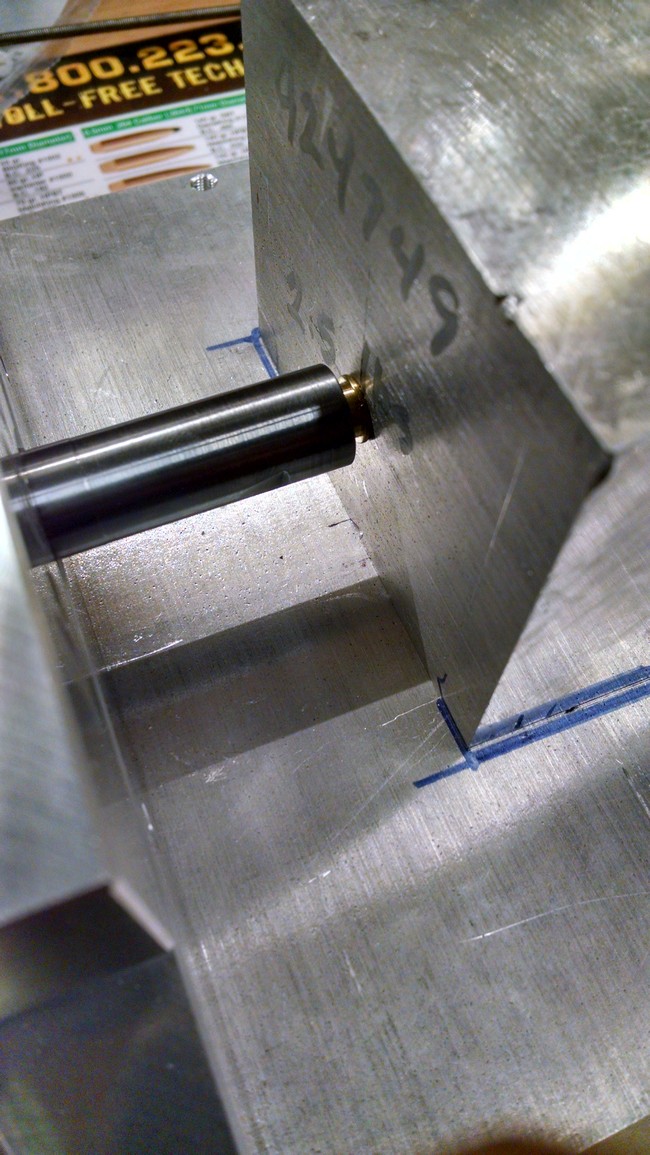
Barrel loose in vise, drawn away from breech face, exposing firing pin. The firing pin (or striker) is a threaded rod, turned down (for the section that passes through the thrust block) by mounting in the drill press and wrapping with sandpaper. 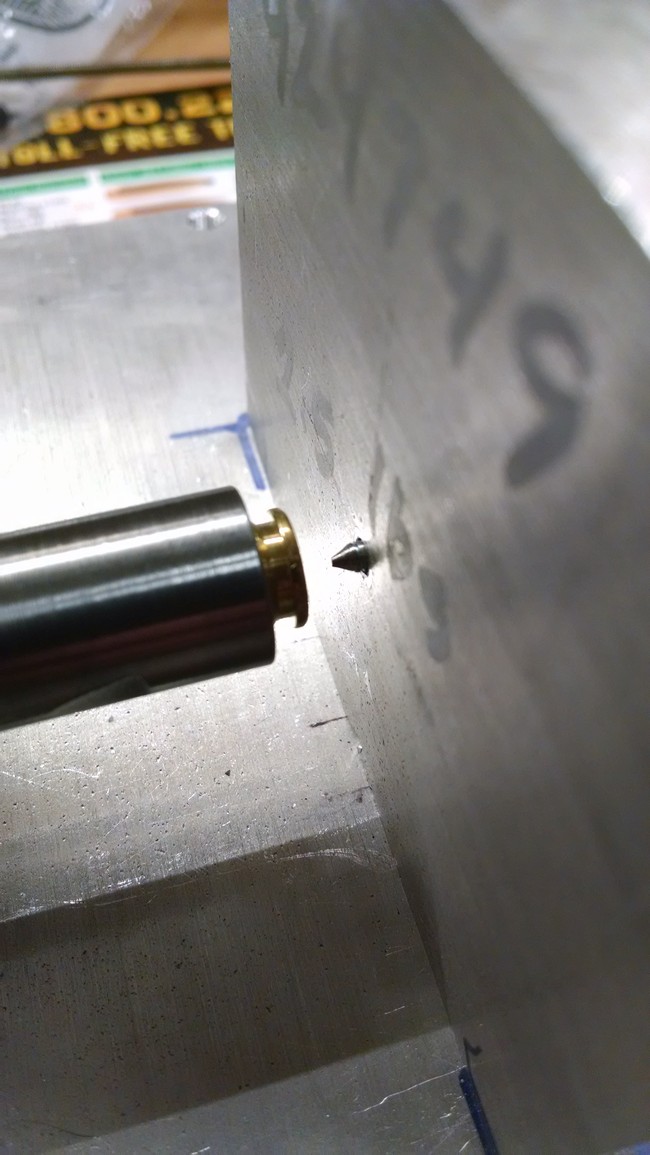
To chamber a round, the vise must be loosened and the barrel drawn towards the front. Insert a round, slide the barrel up to the breech face, tighten the vise. Not wanting any adventure, I needed a "safety". The nut pictured pulls the firing pin (striker) out of contact from the primer. The round can be chambered, the vise secured, and the firing pin drawn back to "cocked", all with no danger of a primer strike. 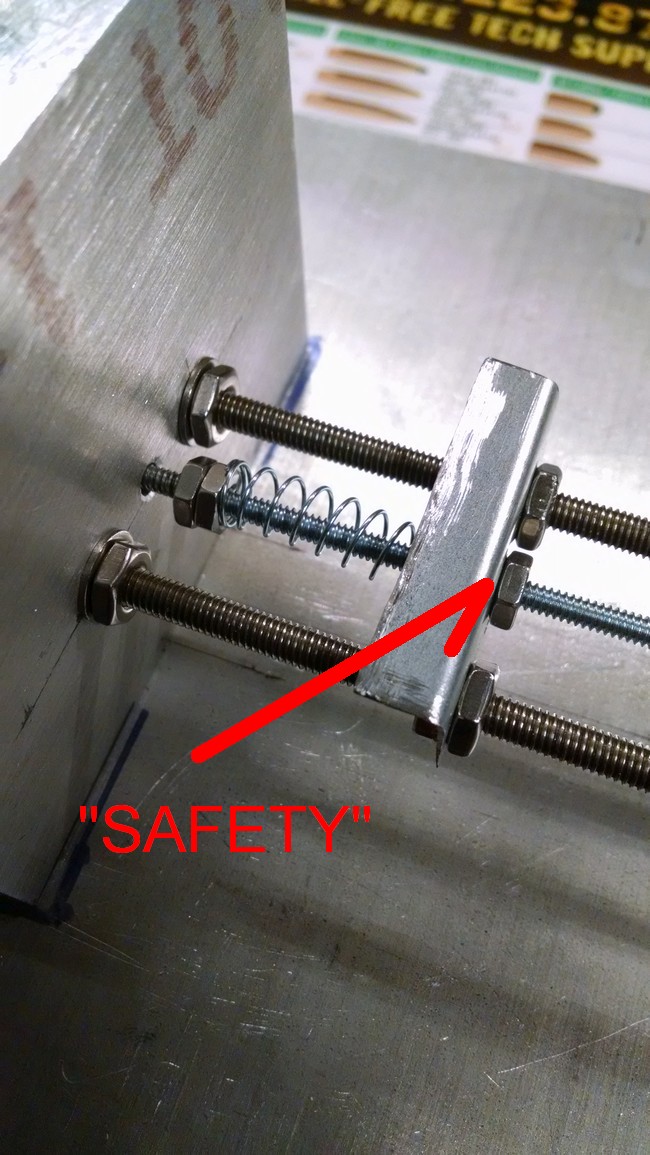

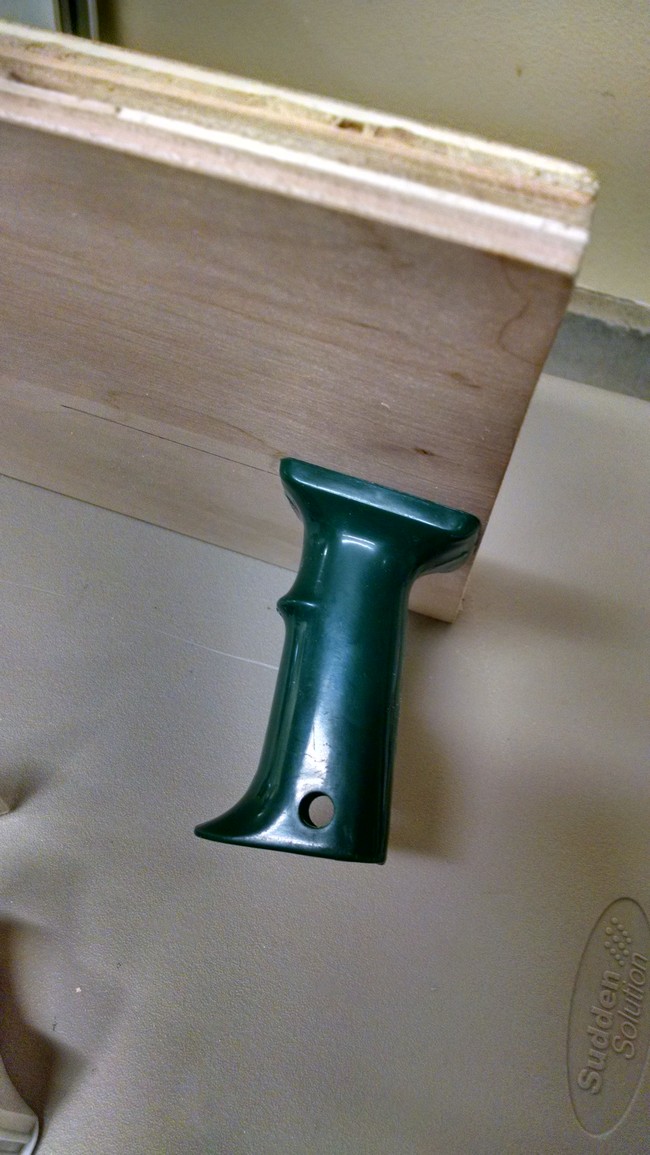
To be "compliant", the device needed a "grip". Searching the garage I found inspiration :) 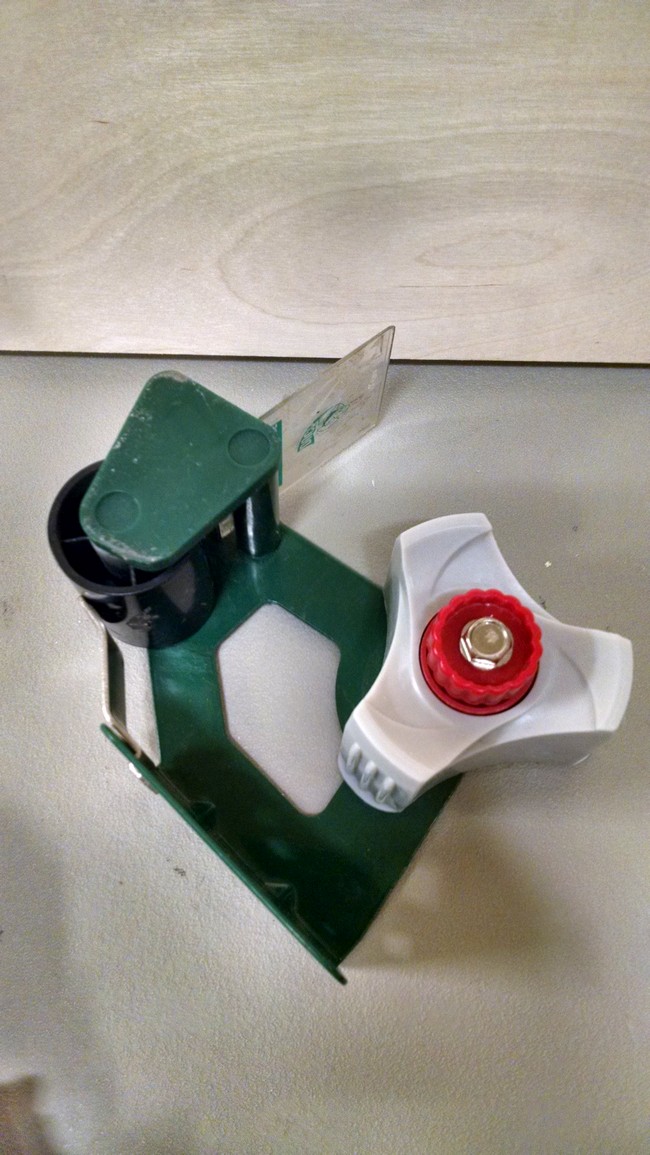
Second version of fire control. 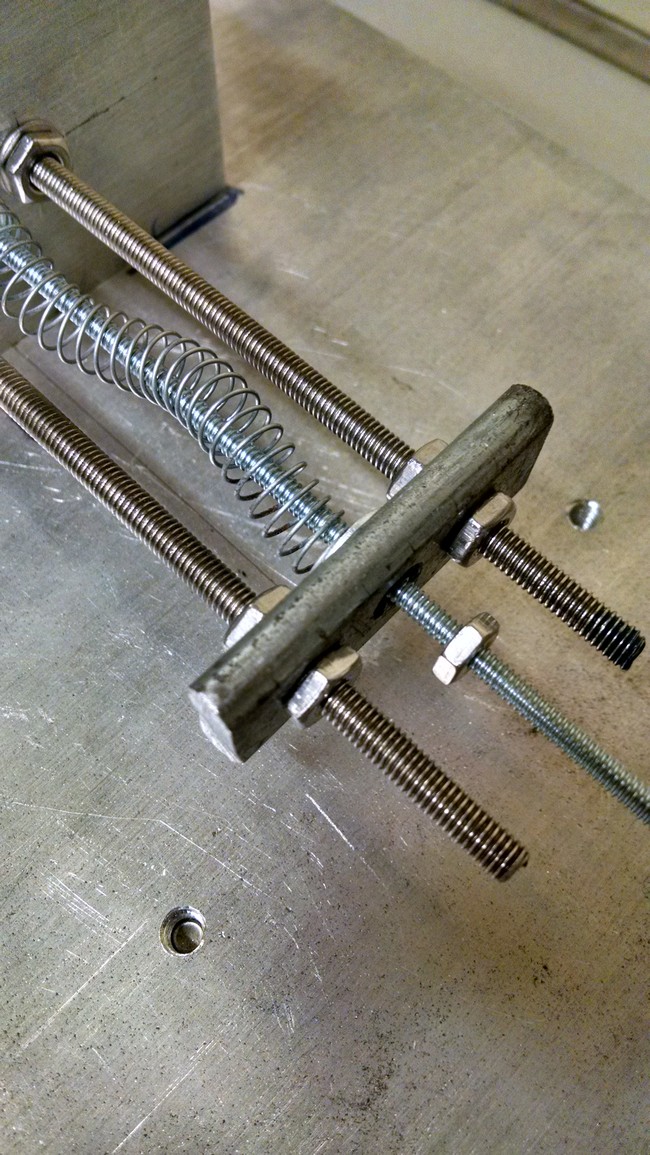
Initial testing (proof of concept) was done at distance with a pull string (For safety, also was't going to glue up a $30 strain gauge without knowing if it worked!). "Use" trigger will be as simple as a length of fishing line routed from the release through a hole in the wood platform to the grip. The "trigger" will consist of a large key ring tied to the fishing line - Grab the "grip", finger in the key ring, pull! I'm considering a momentary switch on the grip, triggering a solenoid to release the pin. Neat, but a complication that's not necessary. Before firing while holding the grip, a safety shield will be mounted to the rear of the wood platform. 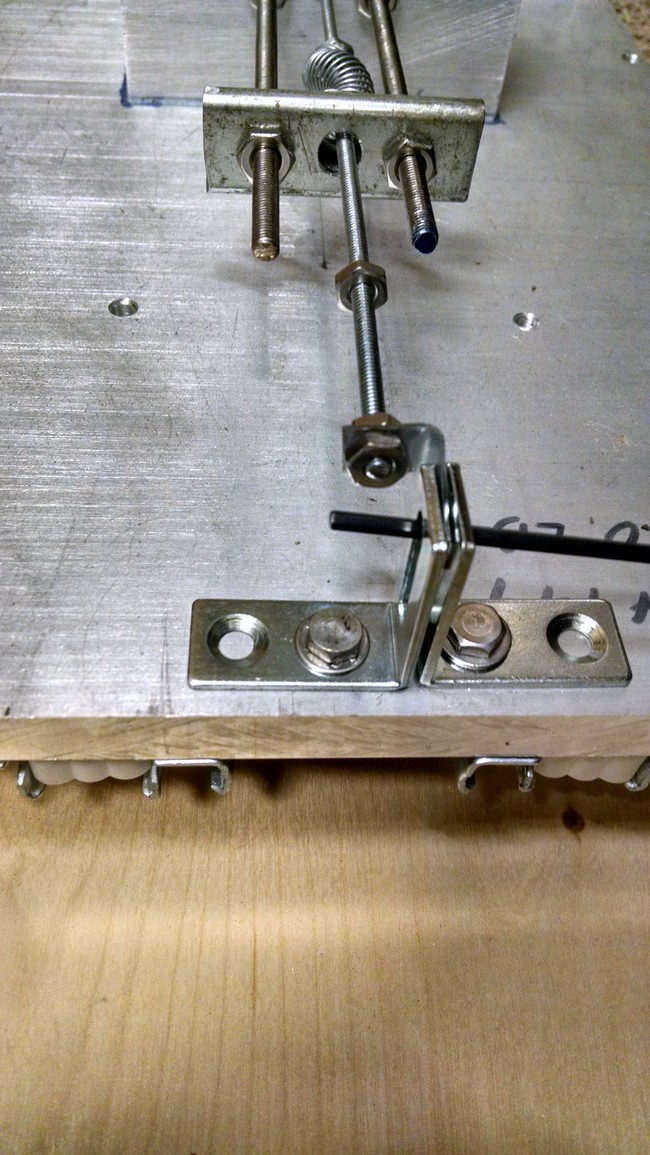
The other half of the operation. 
All prettied up :) 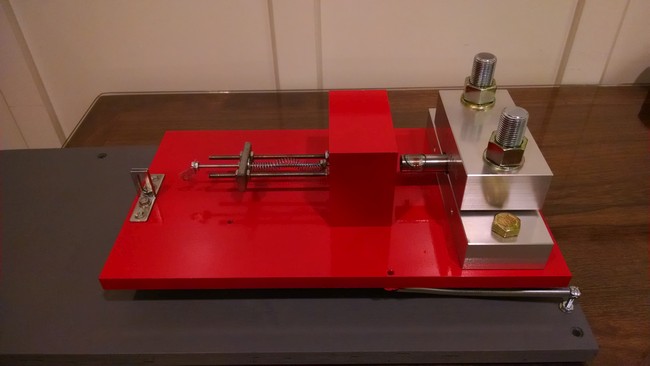
See it in action here! PART 2 |
|
02.11.17 © 10mmreloaded @ gmail.com Any use of information contained within these pages constitutes an agreement to hold the author and web host harmless Copyright names property of respective owners Index |